Building a Better Xmas Treat Tree: What Most People Get Wrong
A Xmas Treat Tree looks effortless in photos. A cone of cookies, candies, or petits fours, stacked and shimmering, instantly festive. But anyone who has attempted one knows the gap between that glossy image and the lopsided, gluey reality can be wide. Whether you are a hobbyist preparing a centerpiece, a small business owner fulfilling holiday orders, or a parent wanting to create something memorable, the details matter more than most guides admit. The good news is that a few practical corrections turn frustration into a genuinely satisfying project.
What Exactly Is a Xmas Treat Tree and Why Has It Gained So Much Attention?
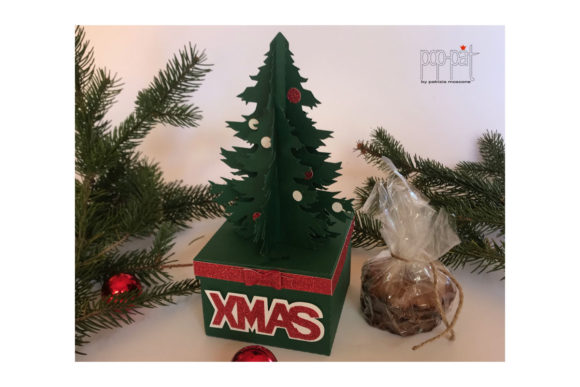
A Xmas Treat Tree is essentially a cone-shaped edible display. Think of it as a decorative frame — often a foam or cardboard cone — covered with individually wrapped or unwrapped treats. They range from simple candy-studded cones to elaborate tiered creations holding dozens of homemade cookies. The appeal is obvious: it doubles as a gift and a decoration, it can be tailored to any dietary preference, and it provides a centerpiece that guests can actually eat from.
Yet the simplicity of the concept masks several pitfalls. Many first-time builders overestimate the structural demands, underestimate the time required, or choose materials that compromise both appearance and freshness. Understanding where things typically go wrong helps you skip the trial-and-error phase entirely.
The Structural Oversight That Ruins Stability
The most frequent mistake is treating the base structure as an afterthought. People grab the first foam cone or rolled cardboard they find, assuming it will hold whatever they attach. This leads to wobbling, tipping, and treats that slide off within hours.
A stable Xmas Treat Tree begins with a sturdy base. Lightweight foam cones work only if you plan to attach very light items such as candy kisses or small meringues. Heavier treats — full-size chocolate bars, gingerbread cookies, or pretzel rods — require a denser form, ideally a wooden or heavy-duty styrofoam cone with a flat, weighted bottom. If your cone feels top-heavy even before you add treats, reinforce it with a wooden dowel inserted through the center and anchored into a small base board.
Check this before you start: Place your cone on the serving plate or tray. Give it a gentle nudge. If it shifts, secure it with museum putty or a dab of hot glue underneath. That single step prevents the heartbreak of a toppled tree.
Adhesion Errors That Undermine Every Layer
Using the wrong adhesive is another common oversight. Melted chocolate, royal icing, and craft glue each behave differently, and applying the wrong one to the wrong surface causes treats to peel, slide, or leave greasy stains.
- Melted chocolate works beautifully on dry, porous surfaces like pretzels or shortbread. It fails on glossy candy wrappers or non-stick coatings.
- Royal icing dries hard and bonds well to both foam and treats, but it requires patience. If you rush and add weight before it sets, the whole layer shifts.
- Hot glue is fast and secure, but it is not food-safe on its own. If you use it, make sure every treat is wrapped, and never glue directly onto unwrapped food.
The better approach is to test your adhesive on a single treat and cone scrap before committing. Let it set for the time you would realistically wait between layers. If it holds firmly without visible residue, you have a match. If not, switch methods before you are halfway up the cone.
Weight Distribution: The Silent Killer of Elegant Trees
Even with a strong base and proper glue, an unevenly loaded Xmas Treat Tree will look unprofessional. Stacking heavy items at the top or clustering similar candies on one side creates visual imbalance and physical instability.
Work from the bottom up, using your heaviest and largest treats at the base. Gradually transition to smaller, lighter items as you ascend. This is not merely aesthetic — it mirrors how gravity behaves. A tree loaded this way is far less likely to lean or shed pieces.
If you want a dramatic topper like a star or a large chocolate figure, keep it lightweight or secure it with a dowel that extends through the center. Do not simply perch a heavy ornament on the peak and hope for the best. Gravity always wins.
Freshness and Timing: Why Your Tree Might Wilt Before Christmas Dinner
Many people build their Xmas Treat Tree days ahead of the event, only to find it looking tired on the big day. Cookies soften, chocolate blooms with white streaks, and wrapped candies become sticky from temperature changes.
The solution is to think of your tree as perishable decor. Build it no more than 24 to 48 hours before it will be displayed. Store it in a cool, dry place away from direct sunlight, ovens, or radiators. If you must build earlier, keep the treats separate and assemble the tree the night before.
Homemade items deserve extra care. Anything with high moisture — soft caramel, fresh fruit, or cream-filled cookies — will weep into neighboring treats. Reserve these for a separate platter. Dry, shelf-stable treats like pretzels, candy canes, meringues, and shortbread hold up best.
For small business owners taking custom orders, communicate this clearly to clients. Let them know the tree is best enjoyed within two days and should not sit out for a week as a centerpiece. This manages expectations and protects your reputation.
Overcrowding and the Loss of Visual Breathing Room
It is tempting to cram as many treats onto a cone as possible, thinking more equals better. The result is a chaotic blob where no single treat stands out, and the cone shape disappears entirely under the clutter.
Leave small gaps between treats. This lets the form read clearly and makes each candy or cookie feel intentional. If you worry about bare spots, fill them with small greenery sprigs, edible glitter, or tiny bows made from ribbon. These accents add texture without overwhelming the structure.
Aim for a spiral pattern as you ascend. Starting at the base, work in a gentle upward spiral, overlapping each row slightly like shingles on a roof. This creates a natural, cohesive look and ensures every treat is visible.
Selection Mistakes: Treats That Resist Attachment or Disappoint Guests
Not every candy or cookie is suitable. Smooth, round items like truffles or wrapped balls look elegant but are notoriously difficult to secure. They roll, they slide, and they leave awkward gaps behind them.
Flat-backed treats — cookies with a flat bottom, rectangular candy bars, peppermint rounds — are far easier to attach firmly. If you love round treats, give them a small flat base by pressing them gently onto a dab of icing and letting it set before adding them to the tree.
Also consider what guests will actually eat. A tree covered entirely in hard candies might look shiny and colorful, but it is less appealing than one that offers variety: salty pretzels, chocolate, nut clusters, and perhaps a few sugar-free options for those with dietary restrictions. A thoughtful selection makes the tree interactive rather than purely ornamental.
Cost and Budget: The Hidden Expenses That Surprise Beginners
A common misunderstanding is that a Xmas Treat Tree is cheap to produce. The truth is that quality materials add up. A good foam or wooden cone, premium treats, adhesive, decorations, and a sturdy platter can easily cost more than a comparable store-bought centerpiece.
Set a realistic budget before you begin. If you are making multiple trees for an event or business, buy treats in bulk from wholesale suppliers rather than retail. Reuse decorative elements like ribbons and picks across multiple trees. And consider using fewer, higher-quality treats rather than filling the cone with cheap fillers that no one wants to eat.
Track your spending on the first tree. If the total surprises you, adjust your approach for the next one rather than cutting corners on stability or freshness.
Presentation and Transport: The Final Hurdle
Many creators focus entirely on the build and neglect how the tree will arrive at its destination. A Xmas Treat Tree that looks perfect on your kitchen counter can become a disaster during a ten-minute car ride.
Build your tree on a plate or tray that can be covered with a lightweight, dome-shaped lid or a clean cardboard box with ventilation holes. Never transport it uncovered. Treats shift, adhesives loosen, and gravity does not pause for holidays.
Let the adhesive cure fully — at least several hours or overnight — before moving the tree. If you are delivering for a client, advise them to place the tree in its final location immediately and not to tilt or jostle it.
Final Thoughts on Getting It Right
The difference between a frustrating Xmas Treat Tree experience and a rewarding one comes down to preparation and a handful of practical decisions. Choose a solid base, match your adhesive to the materials, distribute weight thoughtfully, and respect the timeline. These corrections may seem minor, but they separate a tree that looks amateurish from one that draws genuine admiration.
Whether you are building one for your own table or fifty for a client list, the same principles apply. Treat the project with the same care you would any edible display — because that is exactly what it is. A well-made Xmas Treat Tree is not just a decoration. It is a gift, a conversation piece, and a centerpiece that people actually enjoy dismantling piece by piece.