Star Explosion Box: Crafting a Dimensional Keepsake for Any Occasion
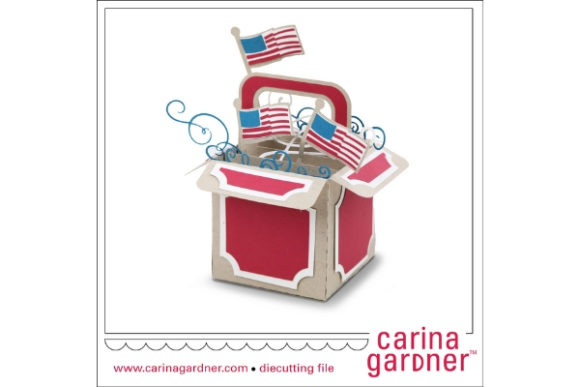
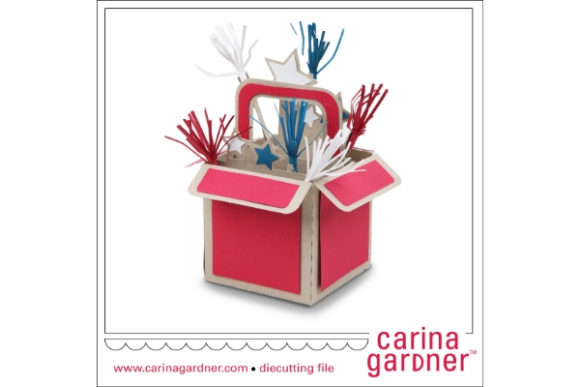
A Star Explosion Box is far more than a simple container. It is an interactive, layered gift that unfolds to reveal photos, messages, and small mementos. Each panel pops outward when the lid is lifted, creating a star-like or multi-tiered display. This design transforms gift giving into an experience, combining the surprise of a pop-up card with the structure of a keepsake box. For creatives, event planners, educators, and small business owners, understanding how to build and use a Star Explosion Box opens a tactile method for storytelling, branding, or simply adding depth to a personal gesture.
The physical build involves a base, several interlocking panels, and a lid. However, the real value lies in how the box maps onto a broader creative process—from concept and material selection to assembly and long-term display. This article walks through the practical workflow, integration with other tools, and tips for producing consistent, high-quality results every time.
Understanding the Star Explosion Box and Its Place in Your Workflow
A Star Explosion Box is not a product you buy ready-made; it is a project you build. This distinction matters because the value comes from the planning and assembly stages. Whether you are a busy professional preparing a wedding gift, a teacher designing a classroom activity, or a small business owner creating custom branding giveaways, the box serves as a physical medium for your content. Its modular structure allows you to treat each panel as an independent design surface, then combine them into a single cohesive piece.
In a typical workflow, the box functions as the final output after you have gathered materials, planned placements, and prepared decorations. But it can also act as a framing device early in the creative process: you decide the theme, the recipient, and the core message, then let the box’s dimensions dictate the scale of your project. For example, a birthday gift might have a central photo on the base and four surrounding panels for short notes. A corporate gift might replace photos with brand icons and taglines.
Where the box fits best depends on your role:
- Gift-givers use it to amplify an emotional message without adding clutter.
- Event planners create them as centerpieces for galas, weddings, or milestone parties. Each guest receives a miniature version with personalized inserts.
- Educators assign them as project-based learning exercises. Students design a box summarizing a historical figure or scientific concept.
- Freelancers and small business owners build them for promotional mailings. The explosive opening naturally intrigues the recipient, increasing engagement with the enclosed marketing material.
How to Plan a Star Explosion Box: Before You Cut a Single Sheet
Planning a Star Explosion Box involves more than choosing colors. A solid plan reduces wasted materials and rework. Start by defining the purpose. Ask: Who is the recipient? What is the occasion? What is the single most important thing they should feel or remember when they open it? This answer guides every subsequent decision.
Selecting Dimensions and Templates
The classic Star Explosion Box uses a square base with sides of 6 to 8 inches. This range fits standard photo sizes and folded notes. A 6-inch base typically holds a 4x6 inch photo in the center, with four 3x3 inch or 4x4 inch panels around it. Larger bases require thicker cardstock to maintain structural integrity. If you are new to the craft, start with a 6-inch base and a strong 180–220 gsm paper. Later, scale up for more ambitious projects.
Many online resources provide free cutting templates. Print them on scrap paper first to test the fit before transferring to your final material. This step alone prevents the most common error: panels that do not align because of slight cutting inaccuracies. For professionals who produce multiple boxes, consider creating a master template from acetate or chipboard that you can trace reliably.
Gathering Tools and Supplies
A clean workflow depends on having the right items ready. Beyond cardstock or scrapbook paper, you will need:
- A sharp craft knife or cutting machine (Cricut, Silhouette) for precision cuts. Scissors can work but often cause uneven edges.
- Bone folder for crisp creases along fold lines. This tool is non-negotiable for a professional finish.
- Strong adhesive such as double-sided tape, glue dots, or liquid glue designed for paper. Avoid regular school glue—it warps thin paper.
- Ruler and cutting mat to keep cuts straight and protect your work surface.
- Decorative elements: printed photos, stickers, ribbon, washi tape, small dried flowers, or thin embellishments that will not prevent the box from closing flat.
Creating a Layout Before Assembly
Lay out all your pieces on a flat surface as they will appear when the box is open. Use small sticky notes to mark where each photo or message goes. This preview lets you adjust spacing and balance without committing to glue. For instance, you might realize that a large embellishment on the middle panel makes the surrounding text feel crowded. Move it to the bottom panel instead. This step only takes five minutes but saves many minutes of frustration later.
Assembly Process: From Flat Sheets to Explosive Reveal
The actual building sequence is straightforward when you have planned ahead. Here is a practical order that minimises handling and ensures alignment.
- Cut and score all pieces. If using a cutting machine, it often scores automatically. For hand-cutting, use the ruler and bone folder to pre-crease every fold line. Crease both sides of the paper for thicker stock.
- Assemble the base and side panels. Fold along the base lines to create a four-sided tray. The corners should meet tightly without gaps. Secure with tape or glue on the inside corners.
- Attach the side panels to the base flaps. Each side panel has a small tab that glues to the base’s inside wall. Apply adhesive to the tab, then press and hold for 15–20 seconds. Reinforce the joint with a small strip of tape if needed.
- Decorate the interior panels before attaching the lid. Glue photos, text, or decorations onto each panel now. It is easier to work with the box open and flat than after the lid is attached. Let adhesive dry completely before moving on.
- Attach the lid. The lid is a separate piece that sits on top of the side walls. Apply glue to the top edges of the side walls and carefully lower the lid into position. Use a ruler to press down evenly, then set a heavy book on top while the glue dries (30–60 minutes).
- Final checks. Open the box fully. Ensure the panels rise smoothly and the lid fits snugly. If any panel sticks, trim a tiny amount from its edge with scissors. If the lid is loose, add a thin strip of paper to the inside of the lid rim to tighten the fit.
Integrating the Star Explosion Box with Other Tools and Materials
The explosion box rarely exists in isolation. Most projects combine it with complementary craft or productivity tools. For instance, if you design your own printed elements, use graphic software (like Canva or Adobe Express) to create photo collages or custom text cards. Print on matte photo paper for vibrant colors that do not slide on the cardstock. For calligraphy or hand-drawn illustrations, sketch on a separate sheet, cut them out, and mount on the panels with foam dots for a layered effect.
If you produce many boxes (e.g., for a class or product launch), consider a batch assembly line. Do step 1 for all boxes at once: cut all pieces. Then step 2 for all boxes, and so on. This reduces setup time and keeps your workspace tidy. Use a template for consistent positioning of decorative elements across every box. A T-square or positioning grid helps align photos to the millimeter.
For those who make boxes as gifts for remote recipients, think about disassembly for shipping. Design the lid to be removable without damaging the box. Wrap the lid separately in bubble wrap and place the open box flat in a padded envelope. The recipient assembles the final connection, which adds to the interactive experience. Include a simple one-page instruction card with illustrations.
Personalization Strategies for Different Audiences
A Star Explosion Box can be deeply personal, but it can also be semi-automated for repeated use. For a personal gift, each panel holds a specific memory. Number the panels in the order you want them viewed, or arrange them as a chronological timeline. For a business or event, standardize the box structure but vary the inserts by customer segment. For example, a real estate agent could create a box for new homeowners: the center holds a key, side panels display contact details, a welcome message, and a small map of the neighborhood. Each box uses the same template, but the recipient’s name is added.
For educators, the box becomes an assessment tool. Have students assemble a box that explains a book’s plot, characters, and theme. Each panel must have one paragraph and one visual. This structure encourages concise writing and careful selection of images. The act of folding and gluing also reinforces hands-on learning.
Quality Control and Long-Term Use
The durability of a Star Explosion Box depends on material quality and assembly precision. Use cardstock with a stiffness rating of at least 250 gsm for the base and lid. Thinner paper collapses under its own weight, especially when the box is opened repeatedly. For the panels, you can use lighter paper (180 gsm) because they are supported by the base.
Check the adhesive strength after 24 hours. If any joint feels loose, reinforce it with a thin bead of liquid glue applied with a toothpick. For boxes that will be handled often, apply a clear matte sealant to protect the printed surfaces from fingerprints. A coat of varnish also helps the paper resist humidity.
Long-term display: The box is designed to stay open as a centerpiece. To keep the panels erect during extended display, insert a small transparent acrylic support ring that falls over the panels. Alternatively, attach a satin ribbon that ties around the open box to hold it in a permanent open position. For storage, simply close the lid and store flat in a clean, dry place.
Adapting the Box to Different Budgets and Time Constraints
Not every project requires premium materials. For a quick prototype or a children’s craft session, use standard printer paper glued to thin cardboard from cereal boxes. The result is less durable but fine for one-time use. For a high-end business gift, invest in textured cardstock, custom foil-stamped text, and a ribbon closure. The box can live on a desk for years, serving as a constant reminder of your brand.
Time-wise, a simple Star Explosion Box takes about 1.5 hours for a beginner (including drying time) and 45 minutes for a practiced maker. If you have a batch of 20, allocate a full day with drying breaks. Plan your sessions around the adhesive curing time: do all cutting and decorating in the morning, glue the lids in the afternoon, and do final checks the next day. This schedule eliminates rush mistakes.
Observations from Real Use Cases
Many makers find that the Star Explosion Box works best when the content is outward-facing—the recipient sees the photos and written messages before they dig for physical gifts. This arrangement emotionalises the experience. People tend to read every note aloud, turning the box into a shared activity. For burial or wedding memorials, the boxes become treasured portable shrines.
Small business owners report that sending a personalised explosion box to a top client leads to higher follow-up response rates than a printed card or a digital message. The physical effort signals care, and the box itself often stays on the client’s desk, reinforcing brand presence. For maximum impact, include a scannable QR code on one panel linking to a thank-you video. That small digital integration bridges the physical and online worlds.
Bringing It All Together
The Star Explosion Box is a versatile craft that fits into creative workflows as easily as a scrapbook page, but with more dimensionality. By planning dimensions carefully, selecting materials with future handling in mind, using templates for consistency, and integrating your chosen content before final assembly, you can produce a polished piece that impresses recipients and stands up to years of display. Whether you make one for a friend or thirty for a corporate event, the process remains grounded in the same principles: clear planning, precise cutting, strong bonding, and thoughtful personalisation. As with any manual process, repetition builds speed and confidence. Start with a simple design, test your materials, and let the box’s structure guide your storytelling. The result is a gift that literally unfolds into something memorable.